
Adding a contact form to your WordPress website is an essential step in improving user experience and capturing leads. A contact form simplifies communication with your visitors by collecting crucial contact information and user messages. In this post, we’ll guide you through the WordPress contact form creation process, provide contact form plugin recommendations, and outline best practices for form customization, validation, and GDPR compliance.
Why Add a Contact Form?
- Improved User Experience: Makes it easier for visitors to reach out to you.
- Lead Generation: Helps gather valuable contact details for follow-up.
- Organized Communication: Directs messages to the right channels with clear form fields.
Choosing a Contact Form Plugin
A WordPress contact form plugin provides features like drag-and-drop builders, email notifications, and shortcode or widget integration. Here are a few recommendations:
- WPForms: Beginner-friendly, drag-and-drop builder with email notifications.
- Contact Form 7: Popular free plugin with flexible customization.
- Ninja Forms: Provides advanced features with a free plan.
How to Add a Contact Form
Adding a contact form to your WordPress website enables visitors to easily reach out with inquiries or feedback. In a few simple steps, you can install a form plugin, create and customize the form, and embed it seamlessly into your site for improved communication and lead generation.
Step 1: Install a WordPress Form Plugin
- In your WordPress dashboard, go to Plugins > Add New.
- Search for your preferred WordPress contact form plugin (e.g., WPForms).
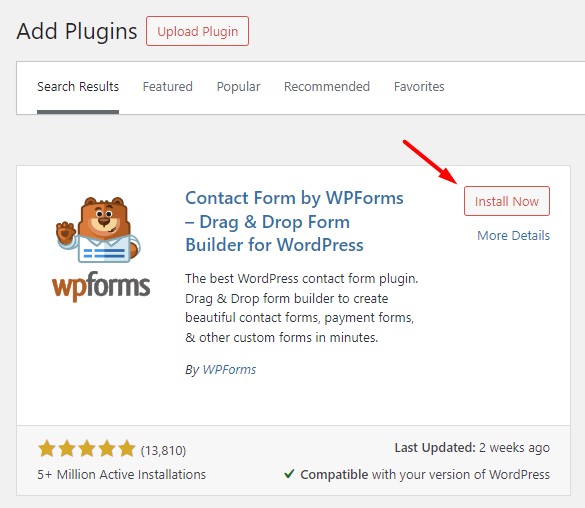
- Click Install Now and then Activate.
Step 2: Create a Contact Form
- After activation, find the new plugin’s menu in your dashboard.
- Click on Add New Form or similar.
- Choose a form template (like “Simple Contact Form”) or start from scratch.
- Use the drag-and-drop builder to add, remove, or edit form fields.
Step 3: Customize Your Contact Form
- Form Fields: Add text boxes, dropdowns, or checkboxes as needed.
- Validation: Ensure important fields like email addresses or phone numbers are required.
- Notifications: Set up automatic email notifications for submissions.
- GDPR Compliance: Add an explicit consent checkbox if you’re capturing personal data.
Step 4: Add the Contact Form to Your Website
- Shortcode: Copy the form’s shortcode and paste it into a page or post.
- Widget: If supported, add a contact form widget to your sidebar or footer.
Step 5: Test Your Contact Form
Submit a few test messages to ensure the form works correctly and that notifications are being delivered. Troubleshoot any errors like missing email notifications or validation issues.
Best Practices for Building Contact Forms
- Simplify the Form: Minimize the number of fields to reduce friction.
- Provide Instructions: Include placeholders or help text for clarity.
- Spam Prevention: Enable reCAPTCHA or honeypot fields.
- GDPR Compliance: Always request user consent before collecting personal information.
Troubleshooting Contact Form Issues
- Missing Emails: Check spam filters, server configurations, or use SMTP plugins.
- Form Not Displaying: Verify the shortcode is correctly placed or check widget settings.
Adding a contact form to your WordPress website can enhance communication and capture valuable leads. Choose the best WordPress contact form plugin for your needs, customize it effectively, and follow these best practices to ensure a seamless user experience.
